Introduction to Victoria Cakes
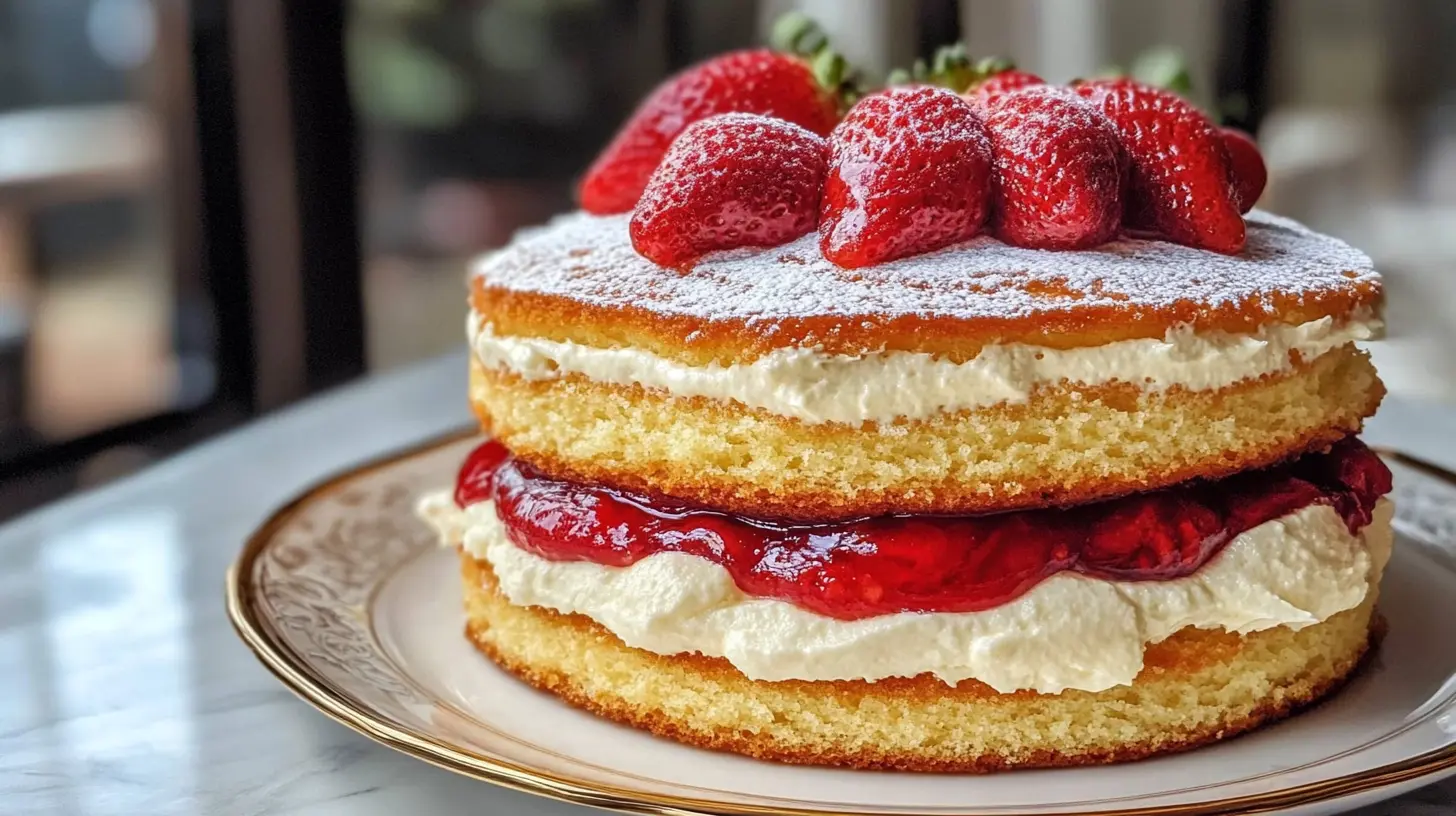
Victoria Cake, also known as Victoria Sponge or Victoria Sandwich, is an iconic British dessert that has truly stood the test of time. In fact, this delightful cake is named after Queen Victoria, who was famously known to enjoy a slice with her afternoon tea. Because of its simplicity and elegance, it has become a staple in British baking, and it’s now beloved by cake enthusiasts worldwide. Typically, the classic Victoria Cake features two layers of light, airy sponge cake filled with a layer of jam and whipped cream, which is then dusted with a sprinkling of caster sugar.
Moreover, the origins of Victoria Cake date back to the mid-19th century, a period when afternoon tea became a fashionable social event among the British elite. Specifically, Queen Victoria’s love for this particular cake, often enjoyed with her tea, contributed to its widespread popularity. Over the years, the recipe has evolved, yet the fundamental elements of the cake remain unchanged: a beautifully soft sponge complemented by sweet, fruity jam and luscious cream.
Victoria Cake’s appeal lies not only in its delightful taste but also in its versatility and ease of preparation. Unlike more complex cakes that require intricate techniques and specialized equipment, Victoria Cake instead can be made with basic ingredients and simple methods, therefore making it accessible to bakers of all skill levels. Whether you’re a seasoned baker or a complete novice, this cake promises rewarding results with minimal effort.
Additionally, another reason for its enduring popularity is its adaptability to various dietary preferences and needs. For instance, with a few clever substitutions, the traditional recipe can be transformed into a healthier version without compromising its deliciousness. Whether you’re looking to reduce sugar intake, avoid gluten, or follow a plant-based diet, there are modifications available to suit your requirements.
For more creative cake ideas, check out this fun Butterfinger Poke Cake recipe on Hailee Recipes.
Health Benefits and Dietary Substitutions
Victoria Cake can be easily adapted to cater to various dietary needs, making it a delightful treat for everyone. Here, we’ll explore how you can modify the traditional recipe to make it healthier and suitable for specific dietary preferences.
Using Whole Grain Flour
One of the easiest ways to boost the nutritional value of your Victoria Cake is by replacing all-purpose flour with whole grain flour. Whole grain flour retains more fiber and nutrients compared to its refined counterpart, aiding digestion and providing a more sustained energy release. While whole grain flour may make the cake slightly denser, the taste remains wonderful and adds a subtle, nutty flavor to the sponge.
Opting for Natural Sweeteners
Refined sugars can be swapped with natural sweeteners such as honey, maple syrup, or agave nectar. These alternatives can lower the glycemic index of the cake and add unique flavors. When using liquid sweeteners, remember to reduce the amount of other liquids in the recipe to maintain the correct batter consistency.
Choosing Dairy-Free Options
For those who are lactose intolerant or prefer a dairy-free diet, it’s simple to substitute the butter and cream in the recipe with plant-based alternatives. Margarine or vegan butter can replace regular butter, and coconut cream or dairy-free whipped topping can stand in for whipped cream. These alternatives still offer the rich texture and flavor that make Victoria Cake so irresistible.
Reducing Saturated Fats
To reduce the saturated fat content, consider using applesauce or mashed bananas as a partial replacement for butter. These fruits add moisture and natural sweetness, allowing you to cut down on butter while still achieving a tender, flavorful sponge.
Gluten-Free Options
For a gluten-free Victoria Cake, replace traditional flour with a gluten-free flour blend. Many gluten-free flours are now available that work as a direct substitute, ensuring the cake retains its light, fluffy texture. Be sure to check that your baking powder is gluten-free, as some varieties may contain gluten.
Ingredients Needed for Victoria Cake
Before you embark on baking your Victoria Cake, it’s important to gather all your ingredients. Here is a comprehensive list, including options for those who need gluten-free or vegan alternatives.
Traditional Ingredients:
- 200g (1 cup) unsalted butter, softened
- 200g (1 cup) caster sugar
- 4 large eggs
- 200g (1⅓ cups) self-raising flour
- 1 teaspoon baking powder
- 2 tablespoons milk
- 200ml (1 cup) heavy cream
- 200g (¾ cup) strawberry jam
- Caster sugar, for dusting
Gluten-Free Alternatives:
- 200g (1 cup) gluten-free baking flour
- 1 teaspoon gluten-free baking powder
Dairy-Free Alternatives:
- 200g (1 cup) dairy-free margarine or vegan butter
- 200ml (1 cup) coconut cream or dairy-free whipping cream
Natural Sweetener Substitutes:
- ¾ cup honey, maple syrup, or agave nectar
Step-by-Step Baking Instructions Victoria Cake.
Now that you have all your ingredients ready, it’s time to dive into the baking process. Follow these detailed instructions to bake your perfect Victoria Cake.
Step 1: Preheat Your Oven
Preheat your oven to 180°C (160°C fan) or 350°F (Gas Mark 4). Grease and line two 20cm (8-inch) round cake tins with parchment paper.
Step 2: Cream Butter and Sugar
In a large mixing bowl, beat the softened butter and caster sugar together until pale and fluffy. This can be done using an electric mixer or by hand with a wooden spoon. The creaming process incorporates air into the mixture, helping to achieve a light and airy sponge.
Step 3: Add the Eggs
Add the eggs one at a time, beating well after each addition. If the mixture begins to curdle, add a tablespoon of flour from the measured amount. This helps to stabilize the batter.
Step 4: Fold in the Flour and Baking Powder
Sift the self-raising flour and baking powder into the bowl. Gently fold the dry ingredients into the wet mixture using a spatula or large metal spoon. Be careful not to overmix, as this can knock out the air you incorporated earlier.
Step 5: Add Milk
Add the milk to the batter and gently fold it in until the mixture reaches a soft, dropping consistency.
Step 6: Divide and Bake
Divide the batter equally between the two prepared cake tins, smoothing the tops with a spatula. Place the tins in the preheated oven and bake for 20-25 minutes, or until the cakes are golden brown and spring back when lightly pressed.
Step 7: Cool the Cakes
Remove the cakes from the oven and allow them to cool in the tins for 5 minutes. Then, turn them out onto a wire rack to cool completely. It’s crucial to let the cakes cool fully before adding the filling to avoid melting the cream.
Decorating and Serving Your Victoria Cake
Once your cakes are completely cool, it’s time to assemble and decorate your Victoria Cake. This process is simple but yields a stunning result.
Step 1: Whip the Cream
In a bowl, whip the heavy cream (or coconut cream for a dairy-free version) until it forms soft peaks. Be careful not to over-whip, as the cream can turn grainy.
Step 2: Spread the Jam
Place one of the sponge cakes on a serving plate or cake stand. Spread a generous layer of strawberry jam over the top. Feel free to experiment with different flavors of jam, such as raspberry or apricot, to add your own twist.
Step 3: Add the Cream
Spoon the whipped cream over the jam layer, spreading it evenly. The combination of jam and cream should create a delicious, smooth filling.
Step 4: Sandwich the Cakes
Place the second sponge cake on top of the cream layer, pressing down gently to sandwich the layers together.
Step 5: Dust with Sugar
Dust the top of the cake with a light sprinkling of caster sugar for a classic finish. For an extra decorative touch, you can use a stencil to create patterns or add a few fresh strawberries on top.
Storing and Freezing Tips Victoria Cake
To keep your Victoria Cake fresh and delicious, proper storage is key. Here are some tips to ensure your cake stays at its best for as long as possible.
Short-Term Storage
If you plan to consume the cake within a couple of days, store it in an airtight container at room temperature. This helps maintain its texture and prevent it from drying out.
Refrigeration
For longer storage, you can refrigerate the cake. Place it in an airtight container to keep it from absorbing other flavors in the fridge. Before serving, allow the cake to come to room temperature to enjoy its full flavor and texture.
Freezing
Victoria Cake can be frozen for up to 3 months. To freeze, wrap the unfilled sponge layers tightly in plastic wrap and place them in a freezer-safe bag. When you’re ready to use them, thaw the cakes at room temperature and assemble with fresh jam and cream.
Overmixing the Batter
Overmixing can result in a dense, tough cake. Be sure to fold the ingredients just until they are combined and the batter is smooth.
Incorrect Oven Temperature
Baking at the wrong temperature can cause the cake to overcook or undercook. Always preheat your oven and use an oven thermometer to verify the temperature.
Removing Cakes from Tins Too Soon
Allow the cakes to cool in the tins for a few minutes before transferring them to a wire rack. This helps the cakes set and reduces the risk of them breaking apart.
Inspiring Stories and Reader Testimonials bout Victoria Cake
Hearing from others who have successfully baked a Victoria Cake can be incredibly motivating. Here are a few testimonials from readers who have tried the recipe and loved the results:
Story 1: A Busy Parent’s Triumph
“I never thought I’d have the time to bake a cake from scratch with two young kids at home, but the Victoria Cake recipe was so straightforward and quick! The look on my kids’ faces when they saw the cake was priceless. It’s now a family favorite!”
Story 2: A Student’s Stress-Buster
“As a college student, finding time to bake can be challenging, but I needed a stress-reliever during finals week. Baking the Victoria Cake was therapeutic, and sharing it with my roommates made it all the more special. The compliments I received were just the cherry on top!”
Story 3: A Senior’s Delight
“Baking has always been a cherished hobby of mine, and the Victoria Cake brought back wonderful memories of afternoon teas with my grandparents. The recipe was easy to follow, and the end result was just as delightful as I remembered. It was a joy to share it with my grandkids.”
By following this guide, you can create a Victoria Cake that’s not only delicious but also fits your dietary preferences and busy lifestyle. The joy of baking a classic, timeless cake like this lies in its simplicity and the happiness it brings to those who share it with you. Whether you’re baking for a special occasion or just because, this Victoria Cake recipe is sure to become a beloved staple in your baking repertoire.
Health Benefits and Dietary Substitutions Victoria Cake
Health Benefits and Dietary Substitutions
Victoria Cake is not only a treat for the taste buds but also a canvas for making healthier choices. By understanding the nutritional benefits of the ingredients and knowing how to make smart substitutions, you can enjoy this classic dessert while catering to various dietary needs.
Using Whole Grain Flour
Whole grain flour, such as whole wheat or spelt flour, is a fantastic substitution for all-purpose flour in baking. Whole grains are rich in fiber, vitamins, and minerals, providing sustained energy and aiding in digestion. The additional fiber in whole grain flour helps to stabilize blood sugar levels, making it a healthier option for those mindful of their sugar intake.
When using whole grain flour, it’s essential to understand that it can make the cake denser. However, this slight difference in texture can add a delightful, rustic touch to the Victoria Cake, giving it a hearty, wholesome flavor. Mixing whole grain flour with a small portion of all-purpose flour can help maintain a lighter texture while still reaping the health benefits.
Opting for Natural Sweeteners
Refined white sugar, while effective at sweetening baked goods, can lead to spikes in blood sugar levels and provide empty calories. Substituting refined sugar with natural sweeteners like honey, maple syrup, or agave nectar can enhance the flavor and nutritional profile of your Victoria Cake. These sweeteners have a lower glycemic index than refined sugar, leading to slower, more consistent energy release.
For instance, honey is known for its antibacterial properties and antioxidants, while maple syrup contains essential minerals like zinc and manganese. When using liquid sweeteners, it’s important to reduce other liquid ingredients in the recipe to achieve the correct batter consistency. Generally, you can substitute 1 cup of sugar with ¾ cup of honey or maple syrup, adjusting the liquid content accordingly.
Choosing Dairy-Free Options
For those who are lactose intolerant or follow a vegan diet, there are plenty of plant-based alternatives to dairy products. Replacing butter with margarine, vegan butter, or coconut oil can lower the saturated fat content and cater to dairy-free needs. These alternatives still provide the necessary fat content to create a tender and moist cake.
Dairy-free milk options like almond milk, soy milk, or oat milk can be used instead of cow’s milk. These plant-based milks are often fortified with essential vitamins and minerals, adding an extra nutritional boost to your cake. For the whipped cream filling, coconut cream is an excellent substitute, offering a rich, creamy texture without the lactose. Simply chill the coconut cream and whip it just like you would dairy cream.
Reducing Saturated Fats
Reducing saturated fats in your Victoria Cake can be achieved by using fruit purees as a partial replacement for butter. Applesauce and mashed bananas are popular choices that add moisture and natural sweetness to the cake. These fruit purees also provide vitamins, minerals, and dietary fiber, contributing to overall health.
Using pureed fruits allows you to cut down on butter without sacrificing the cake’s tender crumb. For each cup of butter replaced, use about ¾ cup of applesauce or mashed bananas. This substitution not only lowers the calorie and fat content but also infuses the cake with delightful, subtle fruit flavors.
Gluten-Free Options
Celiac disease and gluten intolerance require strict avoidance of gluten, but that doesn’t mean you have to miss out on enjoying Victoria Cake. Gluten-free flour blends are widely available and can be used as a direct substitute for regular flour. These blends are often made from a combination of rice flour, potato starch, and tapioca flour, mimicking the texture of wheat flour.
When baking gluten-free, it’s crucial to check that all ingredients, including baking powder, are gluten-free. Some baking powders may contain gluten, so opt for certified gluten-free brands. Additionally, adding a binding agent like xanthan gum or guar gum can help improve the texture of gluten-free baked goods, ensuring your cake remains light and fluffy.
Ingredients Needed for Victoria Cake
Gathering your ingredients is the first step towards baking a perfect Victoria Cake. This section lists all necessary ingredients, including options for those who need gluten-free or vegan alternatives. Ensuring you have everything ready will make the baking process smoother and more enjoyable.
Ingredients Needed for Victoria Cake
Ingredients Needed for Victoria Cake
When preparing to bake a Victoria Cake, having a comprehensive list of ingredients is essential for a smooth baking process. Below is a detailed list of ingredients for a traditional Victoria Cake, along with notes on possible substitutions for different dietary preferences.
Traditional Ingredients:
- 200g (1 cup) Unsalted Butter, Softened: Provides a rich, creamy texture.
- 200g (1 cup) Caster Sugar: Sweetens the cake and contributes to a fine crumb texture.
- 4 Large Eggs: Adds moisture, structure, and richness.
- 200g (1 1/3 cups) Self-Raising Flour: Creates a light, airy cake.
- 1 tsp Baking Powder: Ensures the cake rises well.
- 2 tbsp Milk: Adds moisture and helps to achieve a smooth batter.
- 1 tsp Vanilla Extract: Enhances the flavor of the cake.
For the Filling:
- 4 tbsp Strawberry Jam: The classic filling for a Victoria Cake.
- 200ml (3/4 cup) Whipping Cream: Whipped to stiff peaks for the filling.
Optional Garnish:
- Icing Sugar: For dusting on top of the finished cake.
Dietary Substitutions:
Whether you’re catering to dietary restrictions or just looking to make a healthier version of Victoria Cake, the following substitutions can help:
Gluten-Free:
- 200g Gluten-Free Flour Blend: Use a blend that includes a mix of rice flour, potato starch, and tapioca flour to mimic the texture of wheat flour. Brands like Bob’s Red Mill or King Arthur offer reliable options.
- 1 tsp Xanthan Gum: To improve the texture and binding of the gluten-free batter.
Whole Grain:
- 200g Whole Grain Flour (such as Whole Wheat or Spelt Flour): Adds fiber and nutrients. To maintain a lighter texture, consider mixing half whole grain flour with half all-purpose flour.
Dairy-Free/Vegan:
- 200g Vegan Butter or Margarine: Brands like Earth Balance or Miyoko’s Creamery are good choices. Ensure they are softened for easy mixing.
- 200g Coconut Sugar or a Combination of Natural Sweeteners: For a lower glycemic index option, substitute sugar with honey, maple syrup, or agave nectar. Adjust the liquid content as needed.
- 4 tbsp Aquafaba (Chickpea Brine) or Flax Eggs (1 tbsp Ground Flaxseed + 2.5 tbsp Water per egg): Replaces eggs. Aquafaba is whipped to stiff peaks, while flax eggs are mixed until gelatinous.
- 200ml Coconut Cream or Almond Whipped Cream: For the filling, chill coconut cream and whip it to stiff peaks as you would with regular cream.
Reduced Saturated Fat:
- 150g Unsalted Butter + 50g Applesauce or Mashed Banana: Reduces the amount of butter while adding moisture and subtle flavor. Adjust based on desired consistency.
Natural Sweeteners:
- 150g (3/4 cup) Maple Syrup or Honey + 50g (1/4 cup) Caster Sugar: To keep the batter consistency, reduce other liquids slightly. Maple syrup and honey provide antioxidants and minerals.
Notes on Ingredient Quality:
- Butter: Opt for high-quality, grass-fed butter if possible. It tends to be richer and creamier.
- Eggs: Fresh, organic eggs will yield the best results, providing richer color and flavor.
- Milk: Whole milk creates the most tender crumb. For a lighter option, semi-skimmed or skimmed milk can be used.
- Jam: Homemade or high-quality strawberry jam with a higher fruit content will enhance the flavor of the filling.
- Vanilla Extract: Pure vanilla extract offers superior flavor compared to imitation vanilla.
Ingredient Preparation:
- Softening Butter: Remove butter from the refrigerator 30 minutes before baking to soften. It should be soft enough to press with a finger but not melted.
- Room Temperature Eggs: Leave eggs out of the refrigerator for about an hour. Room temperature eggs mix more evenly into the batter, ensuring a consistent texture.
- Sifting Flour: Sift flour to eliminate lumps and incorporate air, making the batter lighter.
By preparing these ingredients and considering the substitutions based on dietary needs, you set the stage for a successful and delightful baking experience. Up next, let’s dive into the step-by-step baking instructions that will guide you through making your Victoria Cake, ensuring that each step is clear, easy to follow, and yields fantastic results.
Step-by-Step Baking Instructions
Preparation: Getting Everything Ready
- Preheat the Oven: Begin by preheating your oven to 180°C (350°F) or 160°C (320°F) for fan ovens. Ensuring the oven reaches the correct temperature is crucial for the even baking of your Victoria Cake.
- Prepare Your Baking Tins: Use two 20cm (8-inch) round cake tins. Grease the insides with a thin layer of butter or oil and line the bases with parchment paper. This step prevents the cake from sticking and allows for easy removal after baking.
Mixing the Batter: The Heart of Your Cake
- Creaming the Butter and Sugar: Place 200g (1 cup) of softened unsalted butter and 200g (1 cup) of caster sugar into a large mixing bowl. Using an electric mixer or a sturdy wooden spoon, beat the butter and sugar together until the mixture becomes light, fluffy, and pale in color. This step is critical as it incorporates air, which helps to create a soft and light texture in your cake.
- Incorporating the Eggs: Crack the eggs into a small bowl to ensure there are no shells. Beat them lightly with a fork. Gradually add the eggs to the butter and sugar mixture, beating well after each addition. Adding eggs slowly helps to maintain the mixture’s emulsified state, preventing it from curdling. If it does curdle, add a tablespoon of the measured flour to help bring it back together.
- Adding Vanilla Extract: Add 1 teaspoon of vanilla extract to the mixture and beat until combined. Vanilla enhances the overall flavor profile of your cake, giving it a subtly sweet, fragrant note.
- Sifting and Folding in the Flour: Sift 200g (1 1/3 cups) of self-raising flour and 1 teaspoon of baking powder together to remove any lumps and ensure even distribution. Gently fold the flour into the batter using a large metal spoon or a rubber spatula. Folding helps to retain the air you’ve incorporated, ensuring a light, fluffy cake. Add 2 tablespoons of milk to achieve a smooth, dropping consistency.
Baking: Achieving the Perfect Bake
- Dividing the Batter: Divide the batter equally between the two prepared cake tins. Use a kitchen scale for precision, or eyeball it by spooning in the batter evenly. Smooth the surface with the back of a spoon to ensure even cooking.
- Baking the Cakes: Place the tins in the preheated oven on the middle shelf. Bake for about 20-25 minutes or until the cakes are golden brown and spring back when lightly pressed with a fingertip. Another test for doneness is to insert a skewer into the center of the cake—if it comes out clean, the cake is ready.
- Cooling the Cakes: Remove the cakes from the oven and let them cool in their tins for about 5-10 minutes. This initial cooling period helps to set the structure of the cakes. Afterward, run a knife around the edges of the tins to loosen the cakes and gently turn them out onto a wire rack. Peel off the parchment paper and let them cool completely.
Tips for Best Results
- Room Temperature Ingredients: Using room temperature butter and eggs ensures they incorporate more easily and evenly into the batter.
- Accuracy in Measurement: Weighing your ingredients with a digital scale is more accurate than using volume measurements and will result in a more consistent cake.
- Overmixing: Avoid overmixing once the flour is added, as this can develop the gluten and result in a denser cake.
- Even Distribution: Smoothing the batter evenly in the tins ensures uniform rise and an even bake.
- Oven Temperature: Ensure your oven is fully preheated and stable at the correct temperature to prevent under or over-baking.
By following these detailed instructions and incorporating the tips for best results, you’ll achieve a beautifully baked, fluffy, and delicious Victoria Cake that’s perfect for any occasion.
Decorating and Serving Your Victoria Cake
Decorating Your Victoria Cake: Simple Techniques
After baking and cooling your Victoria Cake, it’s time for the fun part—decorating! Even though the traditional Victoria Cake is simple in its presentation, there are various ways to elevate its appearance and make it look enticing for any occasion.
Classic Decoration: The traditional Victoria Cake is filled with a layer of jam and whipped cream or buttercream in the middle and then dusted with a light sprinkling of icing sugar on top. Here’s how you can do it:
- Jam Filling: Spread a generous amount of high-quality strawberry or raspberry jam on the top of one of the cakes. Make sure to spread it evenly to the edges.
- Whipped Cream: Whip 200ml (3/4 cup) of double cream with 1 tablespoon of icing sugar until it forms stiff peaks. Spread or pipe the whipped cream over the jam layer.
- Sandwich Together: Place the second cake layer on top, pressing down gently.
- Icing Sugar: Sift a light dusting of icing sugar over the top layer to finish. You can use a doily or a stencil for a decorative pattern.
Buttercream Variation: If you prefer buttercream to whipped cream, you can use a simple vanilla buttercream instead. To make this:
- Ingredients: Beat together 100g (1/2 cup) of unsalted butter, 200g (1 1/2 cups) of icing sugar, 1 teaspoon of vanilla extract, and 2 tablespoons of milk until smooth and creamy.
- Layering: Spread a layer of jam on one cake and a layer of buttercream on the other before sandwiching them together.
Fresh Fruits and Berries: Adding fresh fruits can not only enhance the look but also add a refreshing flavor to the cake.
- On Top: Arrange sliced strawberries, raspberries, or blueberries neatly on top of the whipped cream or buttercream layer.
- Inside: Mix in some fresh fruits with your filling for a surprise burst of flavor when cutting into the cake.
Decorative Sugars and Edible Flowers: For a more festive or elegant appearance, consider using decorative sugars or edible flowers.
- Edible Flowers: Use flowers such as violets, pansies, or rose petals. Make sure they are untreated and safe to eat.
- Sugars: Edible glitter or colored sugars can add a touch of sparkle to your cake.
Advanced Piping: If you’re skilled with a piping bag, you can pipe intricate designs with buttercream around the edges or on top of the cake. This can range from simple rosettes to complex lace patterns.
Serving Your Victoria Cake: Making Every Occasion Special
Victoria Cake is versatile and suitable for various occasions, from casual tea parties to celebratory events. Here are some creative ideas for serving your beautifully decorated cake:
Afternoon Tea:
Serve your Victoria Cake as part of a traditional British afternoon tea spread. Accompany it with other classic treats like scones, finger sandwiches, and a pot of English breakfast tea.
Birthday Celebrations:
A Victoria Cake can be a delightful birthday cake. Add birthday candles and consider personalizing it with a special message piped in buttercream. Pair it with other party snacks and drinks for a joyous celebration.
Weddings and Anniversaries:
For a more formal setting, a Victoria Cake can be a charming choice for weddings or anniversary celebrations. Decorate with edible flowers or a touch of gold leaf for an elegant look. Serve slices alongside champagne for a touch of sophistication.
Family Gatherings:
During holidays or family get-togethers, a Victoria Cake can be a comforting and nostalgic dessert. It’s simple yet satisfying, making it perfect for sharing with loved ones after a hearty meal.
Picnics and Outdoor Events:
Pack slices of Victoria Cake for a picnic or outdoor event. It’s easy to transport and can be enjoyed with fresh lemonade or iced tea in a lovely natural setting.
Dietary Considerations:
Gluten-Free: If you’re catering to gluten-free guests, use a gluten-free self-raising flour blend in the recipe.
Vegan: For a vegan version, use plant-based margarine, a flaxseed or aquafaba egg substitute, and vegan cream or coconut cream for the filling.
Reduced Sugar: Use a sugar substitute like stevia or erythritol in the batter and filling for a lower-sugar version.
Serving Tips:
Cutting the Cake: Use a sharp, serrated knife to cut clean slices, wiping the blade between cuts to keep the slices neat.
Accompaniments: Serve with a dollop of fresh cream or a scoop of vanilla ice cream for added indulgence. Fresh berries or a berry compote on the side can enhance the flavor.
Presentation:
Cake Stand: Display the cake on a decorative cake stand to make it the centerpiece of your table.
Plating: Serve each slice on elegant plates with a dusting of icing sugar or a drizzle of berry sauce for a restaurant-quality presentation.
Garnishes: Garnish plates with mint leaves or edible flowers to add color and a touch of sophistication.
By following these decorating and serving suggestions, you can transform your Victoria Cake into a showstopper that not only tastes amazing but also looks stunning. Each method and idea brings its own unique flair, ensuring that your cake is memorable and perfect for any occasion, big or small.
Storing and Freezing Tips
Storing and freezing your Victoria Cake correctly is essential to ensure that it remains fresh and delicious, ready to enjoy whenever you desire. Whether you have leftovers or want to prepare the cake in advance, by following these guidelines, you will maintain its texture and flavor perfectly. Additionally, these steps will help you make the most out of every bite, even after freezing or storing for later use.
Storing Your Victoria Cake: Keeping It Fresh
To keep your Victoria Cake at its best for as long as possible, proper storage is essential. Here’s how to store your cake in different environments:
- Room Temperature Storage: If you plan to consume your Victoria Cake within a couple of days, storing it at room temperature is perfectly fine. Here’s how you can do it:
- Covering: Place your cake in an airtight container or cover it with plastic wrap. This will prevent the cake from drying out and protect it from any potential contaminants.
- Location: Store the cake in a cool, dry place away from direct sunlight and heat sources. A pantry or cupboard is ideal.
- Duration: The cake will stay fresh for about 2-3 days at room temperature. Beyond this period, it may start to lose its moisture and freshness.
- Refrigerator Storage: For longer storage, or if your home is particularly warm, refrigerating the cake is a better option.
- Preparation: Wrap the cake tightly in plastic wrap or place it in an airtight container to prevent it from absorbing odors from other foods in the refrigerator.
- Duration: The cake can be refrigerated for up to a week. However, it’s important to note that refrigeration can sometimes cause cakes to dry out, so make sure it’s well-covered.
- Serving: Before serving, let the cake sit at room temperature for about 30 minutes. This helps restore some of its original softness and flavor.
- Individual Slices: If you have cut your cake into slices, you can wrap each slice individually with plastic wrap. This method is great for easy, grab-and-go servings and helps preserve the freshness of each portion.
Freezing Your Victoria Cake: Long-Term Storage
Freezing is an excellent method to store your Victoria Cake for an extended period without compromising its taste and texture. Follow these steps for optimal results:
- Freezing Whole Cakes:
- Cooling: Ensure the cake is completely cooled before freezing. This prevents condensation and ice crystals from forming, which can affect the texture.
- Wrapping: Wrap the entire cake tightly in plastic wrap, followed by a layer of aluminum foil. The double wrapping ensures that the cake is well-protected from freezer burn.
- Container: For added protection, place the wrapped cake in a freezer-safe container or a large, resealable plastic bag.
- Labeling: Label the package with the date of freezing to keep track of how long it has been stored.
- Duration: The cake can be stored in the freezer for up to 3 months. After this period, the quality may start to decline.
- Freezing Cake Layers:
- Preparation: If you plan to assemble the cake later, you can freeze the individual layers. Place a piece of parchment paper between each layer to prevent them from sticking together.
- Wrapping and Storage: Follow the same wrapping and storage instructions as for whole cakes. This method is particularly useful if you want to prepare parts of the cake ahead of time.
- Freezing Slices:
- Portioning: Slice the cake into individual portions before freezing. This makes it easier to thaw only the amount you need.
- Wrapping: Wrap each slice tightly in plastic wrap and then in aluminum foil. Alternatively, place the slices in resealable plastic bags.
- Duration: Slices can be stored in the freezer for up to 3 months, just like whole cakes.
Thawing Your Victoria Cake: Bringing It Back to Life
When you’re ready to enjoy your frozen Victoria Cake, proper thawing is crucial to restore its original texture and taste. Here’s how to do it:
- Thawing Whole Cakes:
- Room Temperature Thawing: Remove the cake from the freezer and unwrap it. Let it sit at room temperature for several hours, or overnight, until fully thawed. This slow thawing helps retain the cake’s moisture.
- Refrigerator Thawing: For a more controlled thawing process, you can place the wrapped cake in the refrigerator for 24 hours. Once thawed, bring it to room temperature before serving.
- Thawing Cake Layers:
- Room Temperature: Unwrap the layers and let them thaw at room temperature for a few hours.
- Assembly: Once thawed, proceed with filling and decorating the cake as desired.
- Thawing Slices:
- Quick Thawing: Unwrap the slices and let them sit at room temperature for about 30-60 minutes. They should thaw relatively quickly due to their smaller size.
- Microwave Thawing: If you’re in a hurry, you can use a microwave. Place the slice on a microwave-safe plate, cover it with a paper towel, and use the defrost setting for short intervals, checking frequently to avoid overheating.
Additional Tips for Storing and Freezing Victoria Cake
Avoid Frosting Before Freezing:
It’s best to freeze the cake layers without any frosting or filling, as these can sometimes become watery or separate when thawed. Instead, add any fillings, frostings, or decorations after the cake has thawed.
Moisture Retention:
To help keep your cake moist during storage, consider placing a piece of parchment or wax paper over the cut surfaces before wrapping the cake. This creates an additional barrier against drying out.
Refreshing the Cake:
If your cake feels slightly dry after thawing, you can refresh it by brushing the layers with a simple syrup (equal parts sugar and water heated until the sugar dissolves). This adds moisture back into the cake and can enhance its flavor.
Consider the Filling:
When planning to freeze a filled Victoria Cake, remember that some fillings freeze better than others. Jam and buttercream generally hold up well, whereas whipped cream might lose its texture and become watery. If using whipped cream, it’s better to fill the cake after it has been thawed.
Individual Wrappings:
Wrapping individual slices or portions not only makes it convenient for future consumption but also helps in maintaining the freshness of each slice. It prevents the need to thaw the entire cake when you only want a small serving.
Labeling:
Always label your frozen cakes with the date of freezing. This helps you keep track of how long the cake has been stored and ensures that you enjoy it at its best quality within the recommended time frame.
By following these storage and freezing tips, you can enjoy your Victoria Cake at its peak freshness and flavor, whether you’re indulging immediately or savoring it days or even months later. Proper storage practices preserve the delightful texture and taste of this classic cake, ensuring that every bite is as enjoyable as the first.
Advanced Tips and Tricks for Baking the Perfect Victoria Cake
Baking the perfect Victoria Cake requires more than just following a recipe; it demands an understanding of the science behind baking and the application of advanced techniques to elevate your results from good to extraordinary. Here, we delve into the intricacies of baking to provide you with the knowledge and skills needed to create a flawless cake every time.
Understanding the Science of Baking
The Role of Ingredients:
- Flour: The backbone of your cake, flour provides structure. Opting for self-raising flour simplifies the process, as it already contains a leavening agent. For a healthier alternative, you can use whole grain flour, which adds fiber, though it might slightly alter the texture.
- Sugar: Not just a sweetener, sugar also impacts the cake’s moisture and texture. Creaming sugar with butter incorporates air, which helps the cake rise. Experiment with natural sweeteners like honey or coconut sugar for a healthier twist, but be aware these can change the texture and flavor.
- Butter: This adds flavor and moisture. Using unsalted butter allows you to control the salt content in your recipe. For a dairy-free option, high-quality margarine or plant-based butter works well.
- Eggs: They provide moisture, richness, and structure. Beating eggs introduces air, contributing to a lighter cake. For a vegan alternative, you can use flaxseed or chia seed mixed with water (1 tablespoon seeds to 3 tablespoons water per egg).
Leavening Agents:
- Baking Powder and Baking Soda: These chemical leaveners produce carbon dioxide gas, which helps the cake rise. Understanding the difference is crucial—baking powder is double-acting, meaning it releases gas twice, while baking soda requires an acid to activate.
- Temperature: Ensure ingredients like eggs and butter are at room temperature before baking. This promotes better emulsification, trapping air and resulting in a finer crumb.
The Chemistry of Mixing:
- Creaming Method: Creaming butter and sugar together traps air and creates a stable mixture that sets the foundation for a light and fluffy cake. Beat until the mixture is pale and creamy, ensuring the sugar dissolves partially, which helps with leavening.
- Folding Technique: When incorporating flour into the wet ingredients, use a gentle folding motion. Over-mixing can develop gluten, making the cake dense and chewy. Aim for a batter that is smooth but not overly worked.
- Adding Wet Ingredients: Incorporate eggs one at a time, beating well after each addition. This ensures the batter remains smooth and prevents curdling, which can affect the texture.
Common Mistakes and How to Avoid Them
Even the best bakers can make mistakes, but knowing how to avoid them can save you a lot of trouble. This section outlines common pitfalls when baking a Victoria Cake and provides practical solutions to ensure your cake turns out perfectly every time.
Common Mistakes and How to Avoid Them in Victoria Cake
Even seasoned bakers can encounter issues when baking a Victoria Cake. Understanding common mistakes and how to prevent them can save you from disappointment. Here, we dissect frequent pitfalls and offer practical solutions to ensure your Victoria Cake turns out perfectly every time.
Uneven Rise
Problem: Your cake rises unevenly, creating a domed or lopsided surface.
Solution:
- Level Baking: Ensure your oven rack is level. An unlevel rack can cause the batter to tilt and bake unevenly.
- Temperature Consistency: Rotate the cake pans halfway through baking to promote even heat distribution.
- Proper Mixing: Incorporate the ingredients thoroughly but gently. Over-mixing can cause uneven air distribution, leading to an uneven rise.
- Baking Strips: Using damp baking strips around the pans can help distribute heat evenly and prevent doming.
Dense Texture
Problem: Your cake comes out dense and heavy instead of light and fluffy.
Solution:
- Correct Leavening Agents: Ensure you’re using fresh baking powder and baking soda. These leavening agents lose their potency over time.
- Gentle Mixing: Fold the flour into the batter gently to avoid overworking it. Overmixing can develop gluten, resulting in a dense texture.
- Proper Creaming: Cream the butter and sugar until light and fluffy. This step is crucial for incorporating air into the batter, which helps create a lighter texture.
- Room Temperature Ingredients: Use ingredients at room temperature to help the batter mix more easily and evenly.
Cracked Top
Problem: The top of your cake is cracked and uneven.
Solution:
- Lower Oven Temperature: A too-high oven temperature can cause the top to set too quickly and then crack as the rest of the cake continues to rise. Try baking at a slightly lower temperature.
- Oven Positioning: Place the cake pans in the center of the oven to promote even heat circulation.
- Moisture Retention: Ensure your batter has enough moisture. If it seems too thick, add a bit more milk to achieve the correct consistency.
Dry Cake
Problem: Your cake turns out dry and crumbly.
Solution:
- Correct Baking Time: Overbaking is a common cause of dryness. Check for doneness a few minutes before the recommended baking time by inserting a toothpick into the center. It should come out clean or with a few moist crumbs.
- Moisture Addition: Add a touch more milk or incorporate ingredients like yogurt or sour cream into the batter for added moisture.
- Simple Syrup: Brush the cake layers with a simple syrup before assembling. This adds moisture and enhances flavor.
Sinking Cake
Problem: Your cake sinks in the middle after baking.
Solution:
- Batter Consistency:
Firstly, ensure that the batter is not too thin. Ideally, a ribbon-like consistency works best. Otherwise, too much liquid can cause the cake to collapse.Proper Oven Temperature:
In addition, an oven that’s too hot can cause the cake to rise too quickly and then sink as it cools. Therefore, it’s important to use an oven thermometer to check the temperature for accuracy.Leavening Balance:
Moreover, check the amount of leavening agents used. Using too much can cause the cake to rise rapidly and then sink.Gradual Cooling:
Lastly, allow the cake to cool gradually in the oven by leaving the oven door slightly ajar for a few minutes before transferring it to a wire rack. This helps prevent sudden temperature changes that could cause sinking.
Sticking to the Pan
Problem: Your cake sticks to the pan and breaks when you try to remove it.
Solution:
- Proper Greasing: Always grease your pans well and line them with parchment paper. This ensures the cake releases easily.
- Cooling Time: Let the cake cool in the pan for about 10 minutes before attempting to remove it. This helps it set and reduces the risk of breaking.
Overly Browned Cake
Problem: The cake is too brown on the outside but undercooked inside.
Solution:
- Correct Pan Choice: Use light-colored, aluminum pans, which conduct heat evenly and prevent over-browning.
- Proper Temperature: Bake at the recommended temperature. If the cake is browning too quickly, cover the top with aluminum foil to prevent further browning while the inside continues to cook.
- Center Placement: Place the cake pans in the center of the oven to ensure even baking.
Curdled Batter
Problem: Your batter looks curdled after adding eggs or liquids.
Solution:
- Room Temperature Ingredients: Ensure all ingredients, especially eggs and butter, are at room temperature. This helps them blend smoothly.
- Gradual Addition: Add eggs one at a time, beating well after each addition. This helps maintain a smooth batter and prevents curdling.
- Proper Mixing: Mix at a medium speed to incorporate ingredients smoothly without introducing too much air, which can cause curdling.
By understanding these common mistakes and implementing these solutions, you can avoid frustration and achieve a perfect Victoria Cake every time. Remember, baking is both a science and an art, and mastering these techniques will help you become more confident and successful in your baking endeavors.
Inspiring Stories and Reader Testimonials
From Busy Parent to Baking Enthusiast
“I never considered myself much of a baker,” confesses Emily, a busy mother of three from Boston. “With a full-time job and kids running around, baking seemed like a luxury I couldn’t afford. However, one rainy Saturday, we decided to try baking a Victoria Cake together as a family activity. The recipe was so straightforward and easy to follow that even my six-year-old could help with mixing the batter. To my surprise, the cake turned out beautifully! It was light, fluffy, and delicious. Since then, it has become a family tradition, and my kids love getting involved. Baking this cake together has not only brought us closer, but also given us some beautiful memories. Plus, it’s a hit at every school event and family gathering!”
A New Hobby for Newlyweds
When we got married, neither of us knew much about cooking or baking,” says Alex, a newlywed who recently moved to a new city with his spouse. So, we wanted to start building new traditions together, and baking seemed like a fun place to start. The Victoria Cake was our first project, and we were both amazed at how simple and rewarding it was. By following the step-by-step instructions, we worked together, laughed, and learned a lot. As a result, the cake was a hit, and it sparked a new hobby for us. Now, we try a new recipe every month, and baking has become a cherished part of our weekends. It’s a wonderful way to bond and create something delicious together.”
Seniors Finding Joy in Baking
Margaret, a 72-year-old retiree, found a renewed passion for baking after trying the Victoria Cake recipe. “I’ve baked all my life, but as I got older, I started to feel less confident in the kitchen. The Victoria Cake recipe was so clear and easy to follow that it reignited my love for baking. I felt a sense of accomplishment when I saw the cake rise perfectly in the oven. I shared it with my bridge club, and everyone was impressed. Baking has given me a sense of purpose and joy, and it’s something I look forward to every week. It’s never too late to find joy in the kitchen.”
A Traveling Baker’s Tale
“Traveling the world as a digital nomad, I miss the comforts of home sometimes,” shares Rachel, who has been living abroad for the past two years. “Finding ingredients and equipment in different countries can be challenging, but I wanted to bring a taste of home with me. I found that the Victoria Cake recipe was incredibly adaptable to different environments. I’ve baked it in tiny apartments in Paris, beach bungalows in Thailand, and mountain cabins in Argentina. Each time, it turned out wonderfully and brought a sense of familiarity and comfort. Sharing the cake with new friends I’ve made along the way has been a beautiful way to connect and share a piece of my culture.”
Busy Professional’s Baking Breakthrough
John, a corporate lawyer from New York City, discovered a newfound love for baking during the pandemic. Since working from home was stressful, he needed a way to unwind. Therefore, he decided to try baking, something he’d never had time for before. Initially, the Victoria Cake recipe caught his eye because it seemed both simple and classic. As he followed the recipe, the process not only became therapeutic but also incredibly satisfying. Furthermore, seeing the cake come out perfectly was a rewarding experience. In addition, it served as a break from the intensity of his work while also giving him a sense of accomplishment. Now, baking has become his weekend ritual, and the Victoria Cake ultimately remains a favorite in his household.
Food Enthusiast’s Dream
“I’ve always loved exploring new recipes and flavors,” says Maria, a food blogger and culinary enthusiast. “The Victoria Cake has a timeless appeal, and I was excited to put my own twist on it. I experimented with different fillings, like lemon curd and fresh berries, to add a unique touch. Each variation was a delight, and my readers loved the creative ideas. The classic recipe is so versatile that it serves as a perfect canvas for culinary creativity. Sharing my baking journey with my audience has been incredibly rewarding, and the Victoria Cake remains one of my most popular posts.”
Conclusion and Call to Action
The delightful journey of baking a Victoria Cake is now waiting just for you. As we’ve explored, through the many inspiring stories and testimonials, baking this classic treat not only can be a bonding experience, but also serves as a therapeutic escape or even a new culinary adventure. Moreover, the recipe’s simplicity further ensures that even those with the busiest schedules, limited resources, or specific dietary needs can still find joy and success in baking this beloved cake.
Now, it’s your turn to become part of this wonderful community of Victoria Cake enthusiasts. Whether you’re baking with your children, impressing your friends at a potluck, finding a healthier way to indulge, or perhaps seeking a delightful break from your routine, the Victoria Cake truly is the perfect choice.
Just imagine the satisfaction of pulling a perfectly risen, golden cake out of the oven, the pleasure of spreading sweet jam and fluffy cream between the layers, and finally, the joy on your loved ones’ faces as they take their first bite. It’s in moments like these that a simple recipe turns into cherished memories.
Take the First Step
Gather Your Ingredients:
- Basic pantry staples are all you need. Flour, sugar, eggs, butter, and baking powder form the foundation, with room for substitutions to suit your needs.
Follow the Steps:
- Detailed instructions ensure that you won’t miss a beat, and helpful tips guide you through any potential pitfalls. Even if you’re a novice, you’ll find the process straightforward and rewarding.
Get Creative:
- Don’t hesitate to put your own spin on the recipe. Add fresh berries, use a different filling, or decorate with a personal touch. The Victoria Cake is versatile, and your creativity will make it even more special.
Share Your Experience:
- One of the greatest joys of baking is sharing your creations. Post pictures, write about your baking adventure, and connect with others who share your passion. Your story could inspire someone else to take the plunge and bake their first Victoria Cake.
- For more information on different types of cakes, you can check out the Wikipedia page on cakes.