If you’re looking to create an eye-catching and delicious dessert for sports lovers, a basketball cake is the perfect choice. Whether you’re celebrating a birthday, a championship win, or simply a basketball-themed party, this cake will bring excitement to any event. Not only is it visually appealing, but it’s also a simple recipe that can be adjusted for various dietary needs, including vegan, gluten-free, and low-calorie options.
In this guide, I’ll show you how to make the perfect basketball cake, detailing the ingredients, substitutions, and step-by-step instructions to make the process easy and fun. The recipe caters to home cooks, busy parents, students, and anyone who loves baking. So, whether you’re an experienced baker or a novice, this recipe will inspire you to get creative in the kitchen.
For those interested in more themed cakes, check out our unicorn cake recipe for another fun dessert option.
Benefits and Advantages of Basketball Cake
The basketball cake is not just a fun design; it also offers several benefits that make it a standout dessert:
Ease of Preparation
One of the best aspects of this cake is its simplicity. The design might look intricate, but you don’t need special tools or extensive baking experience to create it. By using round cake pans and simple decorations like fondant or frosting, you can easily replicate the look of a basketball. Plus, the recipe itself is straightforward, allowing even beginners to follow along with ease.
Dietary Flexibility
This cake can be customized to fit various dietary restrictions. Whether you need to make a gluten-free, vegan, or low-sugar version, there are plenty of options available:
- Vegan: Use plant-based butter and milk alternatives, and substitute eggs with flax or chia seeds.
- Gluten-free: Swap regular flour with a gluten-free flour blend to make the cake safe for those with gluten sensitivities.
- Low-calorie: Substitute regular sugar with low-calorie sweeteners like stevia or erythritol, and reduce the fat content by using lighter oils.
Perfect for Any Occasion
The basketball design makes this cake ideal for sports-themed parties, but you can also adapt it for any event. Whether it’s a birthday celebration, a watch party for the NBA finals, or a fun dessert for a team gathering, the cake is versatile enough to fit a variety of occasions.
If you’re looking for other party-friendly cake ideas, be sure to check out our recipe for birthday cake for inspiration.
Ingredients Overview
Essential Ingredients for Basketball Cake
Here’s what you’ll need to make a basic basketball cake. You can adjust the ingredients as needed for dietary preferences, which I’ll cover in the next section.
- 2 cups all-purpose flour (use gluten-free flour for a gluten-free version)
- 1 ½ cups sugar (or use a sugar substitute for a low-calorie version)
- ½ cup unsalted butter (or vegan butter for a plant-based option)
- 1 cup milk (or almond milk for a vegan version)
- 3 large eggs (substitute with flax or chia seeds for vegan)
- 2 tsp baking powder
- 1 tsp vanilla extract
- Orange and black food coloring for decorating (to mimic the basketball design)
- Buttercream frosting or fondant for decoration
Dietary Substitutions to Customize Your Basketball Cake
For those with dietary preferences or restrictions, here are some easy substitutions:
- Vegan Version: Replace the butter with a vegan alternative like coconut oil, and use almond or oat milk instead of dairy milk. Eggs can be replaced with a mixture of ground flax seeds and water (1 tablespoon of flax seeds mixed with 3 tablespoons of water equals one egg).
- Gluten-Free Version: Swap out the all-purpose flour with a gluten-free baking blend that includes xanthan gum for proper texture.
- Low-Sugar Version: Use a sugar substitute such as erythritol or monk fruit sweetener to reduce the sugar content while maintaining sweetness.
For more gluten-free dessert options, take a look at our gluten-free chocolate chip cookie recipe.
How to Prepare the Perfect Basketball Cake: Step-by-Step Guide
Follow these steps to make the perfect basketball cake:
First Step: Prepare the Cake Batter
- Preheat the oven to 350°F (175°C) and grease two 9-inch round cake pans.
- In a large bowl, whisk together the flour, baking powder, and salt.
- In another bowl, cream the butter and sugar until light and fluffy. Add the eggs one at a time, mixing well after each addition.
- Alternate adding the dry ingredients and milk to the butter mixture, starting and ending with the dry ingredients. Stir in the vanilla extract.
- Divide the batter evenly between the two prepared pans.
Second Step: Bake the Cakes
- Bake the cakes in the preheated oven for 25-30 minutes, or until a toothpick inserted into the center comes out clean.
- Allow the cakes to cool in the pans for 10 minutes, then transfer them to a wire rack to cool completely.
Third Step: Shape the Basketball
- Once cooled, trim the tops of the cakes to create a flat surface.
- Stack the cakes on top of each other with a layer of frosting in between.
- Crumb-coat the entire cake with a thin layer of frosting and chill for 30 minutes.
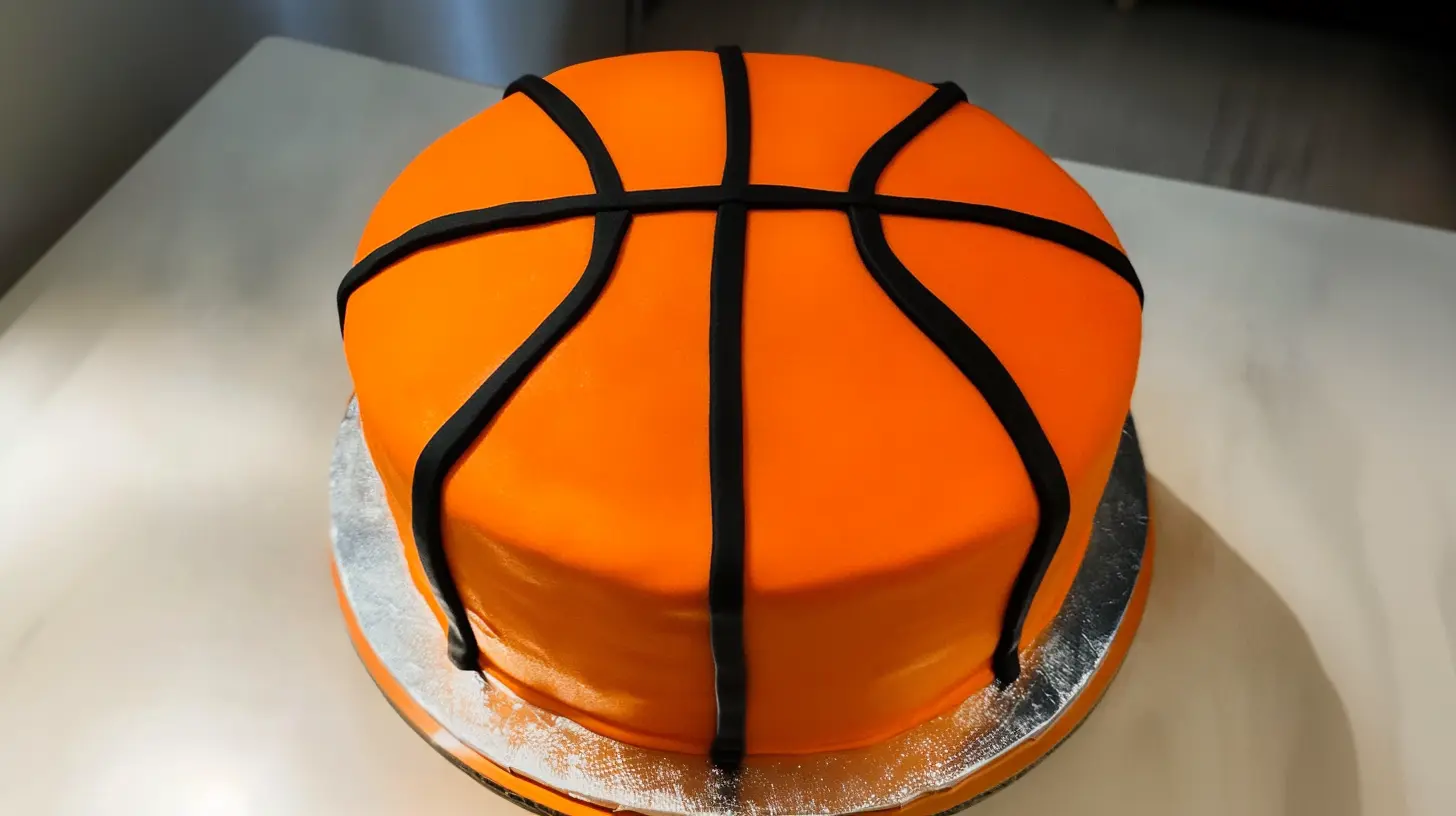
Fourth Step: Decorate the Cake
- Tint your frosting or fondant orange to resemble a basketball.
- Cover the cake with the orange frosting or fondant.
- Use black food coloring or fondant strips to create the characteristic lines of a basketball.
Serve and Enjoy
Your basketball cake is now ready to be served. It’s sure to impress both basketball fans and dessert lovers alike!
For more decorating ideas and tips, check out our fondant tutorial.
Mastering Basketball Cake: Advanced Tips and Variations
Now that you’ve mastered the basics, here are some advanced tips to help elevate your basketball cake:
- Flavor Variations: Add cocoa powder to the batter for a chocolate version, or try using a citrus flavor to complement the orange color.
- Decorative Ideas: Use fondant or edible paint to add a team logo to the cake for an extra special touch.
- Texture Tips: If you prefer a more textured look, use a basketweave piping technique to give the cake an authentic basketball feel.
How to Store Basketball Cake: Best Practices
To ensure your basketball cake stays fresh, follow these storage tips:
- Refrigerate: If you’re making the cake ahead of time, store it in an airtight container in the fridge for up to 5 days.
- Freeze: You can freeze the unfrosted cake layers for up to 3 months. Thaw them overnight in the refrigerator before decorating.
- Reheat: Allow the cake to come to room temperature before serving to ensure the best flavor and texture.
Nutritional Value of Basketball Cake
Here’s an estimate of the nutritional content for one slice of basketball cake (based on 12 servings):
- Calories: 350 kcal
- Fat: 18g
- Carbohydrates: 45g
- Protein: 5g
- Fiber: 1g
- Sugar: 30g
For those seeking a lighter version, you can use low-calorie sweeteners and plant-based ingredients to reduce the overall calorie count.
FAQs: Frequently Asked Questions About Basketball Cake
Can I Make a Vegan Basketball Cake?
Yes! Simply use plant-based butter, almond milk, and flax eggs as substitutions.
How Do I Achieve the Perfect Basketball Shape?
Use round cake pans and trim the tops to create a smooth, even surface. Cover the cake with orange frosting and use black fondant or icing to mimic the basketball lines.
Can I Make This Cake Ahead of Time?
Absolutely! You can bake the cake layers in advance and store them in the refrigerator or freezer until you’re ready to assemble and decorate.
How do you get texture on a basketball cake?
To achieve the realistic texture of a basketball on your cake, you can use a few different techniques depending on the materials available and your desired look:
- Basketweave Piping Tip: One popular method is to use a basketweave piping tip to create lines that mimic the pebbled texture found on real basketballs. This is a simple yet effective technique that involves applying frosting in short dashes or lines all over the cake.
- Fondant Impressions: Another option is to use fondant to cover the cake, then use a textured mat or even a clean mesh cloth to press lightly onto the fondant, creating an embossed effect. This will leave small indents that resemble the bumps on a basketball.
- Edible Pebble Sprinkles: For a quicker method, you can use edible pebble or bead-like sprinkles that add a textured feel to the cake’s surface. These sprinkles can be lightly pressed onto the frosting or fondant before it sets.
- Embossing Tools: If you’re looking for more precision, you can use specialized cake decorating embossing tools to create a pattern that mimics the surface of a basketball.
For more details on fondant techniques, you can explore the comprehensive Fondant entry on Wikipedia, which provides more insights into how it’s used in cake decorating.
Does a Piece of Cake Need to Be Refrigerated?
It depends on the type of cake and its ingredients. In general:
- Buttercream or Fondant-Covered Cakes: If the cake has a buttercream or fondant icing and no perishable fillings, you don’t need to refrigerate it immediately. These cakes can typically sit at room temperature for 2-3 days. However, refrigeration may extend their shelf life and prevent the frosting from becoming too soft in warmer conditions.
- Cakes with Cream, Custard, or Fruit Fillings: If your cake has perishable fillings like whipped cream, custard, fresh fruit, or cream cheese, refrigeration is necessary to prevent spoilage. Keep these cakes in an airtight container and refrigerate them within two hours of serving to maintain freshness.
How to Make Basketball Color for Cake?
To create the distinctive orange color of a basketball for your cake, follow these steps:
- Start with White Frosting or Fondant: Begin by using a white base for either buttercream frosting or fondant. This ensures that the color you add will mix evenly.
- Mix Gel Food Coloring: Use gel food coloring for the most vibrant results. To get the basketball’s signature orange, mix a small amount of red and yellow gel food colorings in a ratio of about 1:3 (one part red to three parts yellow). You can add more or less of either color to adjust the shade until it looks right.
- Blend Gradually: Add the color in small amounts and stir well after each addition to avoid oversaturation. Continue until you get the desired orange hue. For a more realistic look, add a tiny touch of brown to deepen the color slightly.
How Do You Store a Smash Cake?
A smash cake is often used for a baby’s first birthday, and it’s typically a smaller, less complicated cake. To store it properly:
- Before Serving: If you’ve made the cake ahead of time, store it in the refrigerator to keep the frosting firm. Ensure it’s in an airtight container or well-wrapped to prevent it from drying out.
- After Serving: If there are leftovers, you can refrigerate them in an airtight container for 2-3 days. Since the smash cake is often small and designed to be “smashed” quickly, it typically doesn’t need long-term storage.
- Freezing Option: If you want to preserve the cake for longer, wrap it tightly in plastic wrap and place it in a freezer-safe bag or container. It can last up to 3 months in the freezer.
How Do You Smooth a Ball Cake?
Smoothing a ball cake requires careful handling to achieve a perfectly round shape. Here’s a step-by-step process:
- Crumb Coat the Cake: Apply a thin layer of buttercream or ganache all over the cake, known as a crumb coat. This will trap crumbs and give you a smoother surface to work with. Place the cake in the refrigerator to chill and set the crumb coat for 30 minutes.
- Use a Cake Scraper: After applying the final layer of frosting, use a cake scraper to smooth the surface. Rotate the cake on a turntable as you gently scrape off excess frosting, ensuring even coverage.
- Fondant Smoothing: If you’re using fondant, lay the rolled fondant over the cake and use your hands or a fondant smoother to gently press and smooth it over the surface. Stretch the fondant carefully as you work to avoid creases.
- Final Touches: Go over the cake with a small offset spatula to refine any uneven spots. For the smoothest finish, you can dip the spatula in warm water and then dry it before using it to smooth the surface.
What Causes Heavy Texture in Cake Making?
A heavy or dense texture in cakes can result from several factors:
- Overmixing the Batter: When you overmix cake batter, especially after adding the flour, you develop the gluten in the flour, which can make the cake dense and chewy instead of light and airy.
- Too Much Liquid: Using too much milk or other liquid ingredients can weigh down the batter, causing a dense texture. Always measure ingredients carefully to ensure proper proportions.
- Old Leavening Agents: If your baking powder or baking soda is expired or inactive, the cake will not rise properly, leading to a denser, heavier texture. Always check the freshness of your leavening agents before baking.
- Wrong Oven Temperature: Baking the cake at too low a temperature can prevent it from rising correctly. Ensure your oven is properly preheated to the right temperature for the recipe.
How Long Can a Cake Sit Out Uncovered?
A cake can typically sit out uncovered for a short period of time—about 2-3 hours—before it starts to dry out. After this time, the exposed cake will begin losing moisture, and the frosting may harden.
To keep a cake fresh and moist, it’s best to cover it with plastic wrap, foil, or a cake dome if you plan to leave it at room temperature for longer. If you’re leaving the cake out in a warm environment, it’s advisable to cover and refrigerate it sooner to prevent melting or spoilage.
How Long Will a Cake Stay Fresh?
The freshness of a cake depends on its ingredients and how it’s stored. Typically, a cake will stay fresh for:
- At Room Temperature: A cake with buttercream or fondant can last 2-3 days if stored in an airtight container.
- Refrigerated: Cakes with perishable fillings or frostings, like cream cheese or whipped cream, can last up to 5 days in the refrigerator. Be sure to cover the cake to prevent it from drying out.
- Frozen: If properly wrapped and stored in the freezer, a cake can remain fresh for up to 3 months. Thaw the cake in the refrigerator overnight before serving.
Conclusion
Understanding how to properly make, decorate, and store cakes like a basketball cake is essential for ensuring both taste and presentation. Whether you’re trying to replicate the textured surface of a basketball or wondering how long your cake will last at room temperature, these detailed tips will help you make the most of your baking projects. By following these guidelines, you can avoid common cake-making pitfalls, like heavy textures or drying out, and enjoy a fresh and delicious cake for days.
Happy baking!

Posted by: Hailee | August 7, 2024
I’m passionate about sharing sweet and savory recipes that I’ve meticulously tested and perfected in my own kitchen. Join me on this delicious journey to experience the best of culinary creativity.